Roasted root vegetables

Roasted Root Vegetables with Honey & Herbs


Delicious Roasted Root Vegetables Recipe with Honey & Herbs for Aussie Winters 

When winter hits, nothing beats the aroma of roasted root vegetables wafting from the oven. Whether you’re feeding a family, entertaining guests, or meal-prepping for the week, this dish is a guaranteed crowd-pleaser. 

It’s healthy, hearty, and highlights everything we love about seasonal Aussie produce—carrots, sweet potatoes, parsnips, and potatoes—each bringing their own unique texture and taste to the table. Finished with a drizzle of golden honey and a sprinkle of fresh herbs, the result is both rustic and refined. 

And best of all, every ingredient can be found fresh and local at Victoria Fruit Palace. 


Ingredients (Get them all at Victoria Fruit Palace): 

  • 2 carrots, peeled and chopped 
  • 2 potatoes, cubed 
  • 1 sweet potato, cubed 
  • 1 parsnip or beetroot (optional), peeled and chopped 
  • 2 tablespoons olive oil 
  • 1 tablespoon honey 
  • A few sprigs of fresh thyme or rosemary 
  • Salt and freshly ground black pepper 


Instructions: Simple Steps, Fantastic Flavour 

Preheat & Prep:
Heat your oven to 200°C (fan-forced). Line a large baking tray with parchment paper or foil for easy cleanup. 

Season the Veg:
In a large mixing bowl, toss all chopped vegetables with olive oil, honey, fresh herbs, salt, and pepper. Make sure everything gets a nice, even coat—it’s the key to golden edges and big flavor. 

Ready to Roast:
Spread the veggies out on the baking tray in a single layer. Avoid crowding—this ensures everything roasts instead of steaming. 

Oven Time:
Roast for 35 to 45 minutes, flipping once halfway through. You’ll know they’re done when they’re golden brown on the edges and fork-tender in the middle. 

Serve It Up:
Dish out immediately. This side pairs beautifully with roast meats, fish, grain bowls—or you can enjoy it as a stand-alone vegetarian main dish with a dollop of Greek yogurt or a splash of balsamic glaze. 


Serving Ideas & Variations 

  • Add crunch: Toss in a handful of walnuts during the last 10 minutes of roasting. 
  • Spice it up: Try a pinch of cumin, paprika, or cinnamon for a Moroccan twist. 
  • Sweet swap: Maple syrup makes a great substitute if you’re out of honey. 
  • For extra protein: Crumble feta or goats’ cheese over the top before serving. 


Why This Dish Is a Must for Aussie Winters 

Roasted root vegetables have long been a staple in Aussie kitchens during winter. Why? They’re economical, easy to prep, and incredibly satisfying. 

More importantly, this dish is as flexible as you need it to be. Hosting a Sunday roast? It’s the perfect side. Need a vegetarian dinner that still feels filling? Add chickpeas or quinoa, and it’s a meal. Want a no-fuss dish for your meal prep? It keeps beautifully and reheats even better. 

Cooking Tips from the Locals 

  • Cut uniformly: To ensure even roasting, chop all veggies to roughly the same size. 
  • Keep skins on: For potatoes and sweet potatoes, leaving the skin on adds nutrients and crunch. 
  • Don’t skimp on oil: It helps caramelize the natural sugars in the vegetables. 


Final Thoughts 

There’s something truly magical about a tray of roasted vegetables glistening with honey and herbs. It’s comforting, earthy, and naturally sweet—just what you need when winter chills hit. By choosing Victoria Fruit Palace, you not only get the freshest ingredients but also support local growers and producers. 

From market to oven, this dish is proof that good food doesn’t need to be complicated—it just needs to be fresh and full of flavor. 

Need fresh produce or pantry essentials delivered? Shop online now at Victoria Fruit Palace!

Hearty vegetable and lentil stew

Hearty Vegetable & Lentil Stew


Nourishing Hearty Vegetable & Lentil Stew Recipe for Aussie Winter Wellness 

When the cold weather rolls in, Aussie kitchens come alive with simmering pots of soup and stew—and this hearty vegetable & lentil stew is a true classic. It’s a dish that feels like a warm hug: filling, nutritious, and brimming with robust, earthy flavors. 

Perfect for families, vegetarians, or those simply seeking a nourishing winter dish, it brings together pantry staples and seasonal vegetables to create something far greater than the sum of its parts. 

Better still, every ingredient is available fresh at Victoria Fruit Palace, making your winter meal prep easier than ever. 


Ingredients (Grab Them at Victoria Fruit Palace): 

  • 1 tbsp olive oil 
  • 1 onion, diced 
  • 2 garlic cloves, minced 
  • 2 carrots, chopped 
  • 2 celery stalks, chopped 
  • 1 zucchini, diced 
  • 1 cup pumpkin or sweet potato, cubed 
  • 1 can diced tomatoes (or use 2–3 fresh tomatoes, chopped) 
  • 1 cup dried red lentils, rinsed 
  • 4 cups vegetable stock 
  • 1 tsp ground cumin (optional, for a hint of spice) 
  • Salt and black pepper to taste 
  • A handful of spinach or kale (optional for added greens) 


Step-by-Step Instructions for Vegetable & Lentil Stew

Start with Flavor:
In a large pot, heat the olive oil over medium heat. Add diced onion and minced garlic. Sauté for 3–5 minutes, or until soft and fragrant. 

Build the Base:
Add the carrots, celery, zucchini, and pumpkin or sweet potato. Cook for 5–7 minutes, stirring occasionally, to develop a gentle caramelization on the veggies. 

Add the Heart:
Stir in the rinsed lentils, canned or fresh tomatoes, vegetable stock, and cumin if using. Stir everything together to combine. 

Simmer to Perfection:
Bring the mixture to a gentle boil, then reduce heat to low. Cover and simmer for 25–30 minutes, or until lentils and vegetables are tender. 

Finish with Greens:
Stir in a handful of chopped spinach or kale and simmer for an additional 2–3 minutes until just wilted. 

Season & Serve:
Taste and adjust with salt and pepper. Serve piping hot with crusty bread, toasted sourdough, or ladled over a bed of brown rice. 


Why Aussie Love This Stew 

It’s no secret: hearty vegetable & lentil stew is a winter staple across Australian households. It’s the kind of meal that makes you feel good from the inside out. Warm, filling, and affordable, it’s ideal for anyone wanting to cook nutritious meals without fuss or fancy ingredients. 

Plus, it’s perfect for batch cooking. Double the recipe, freeze leftovers, and you’ve got easy lunches or dinners ready to go.


Healthy, Wholesome & Versatile 

  • Plant-Based Protein: Red lentils are a fantastic meat-free protein source. 
  • Fiber Boost: With root veggies and greens, it’s a gut-friendly option. 
  • Budget-Friendly: No expensive ingredients, and feeds the whole family. 
  • Easy to Customise: Add mushrooms, peas, capsicum, or even a splash of lemon for brightness. 


Expert Cooking Tips 

  • Rinse lentils well to avoid bitterness and help them cook evenly. 
  • Chop veggies uniformly so everything cooks at the same pace. 
  • Use homemade stock for deeper flavor if available. 
  • Add chili flakes or smoked paprika for a spicy, smoky twist. 
Creamy pumpkin soup recipe

Creamy Pumpkin Soup with Garlic Croutons


Creamy Pumpkin Soup Recipe for Cozy Aussie Winters 

Australia’s chilly winter evenings are tailor-made for heartwarming comfort foods, and few dishes deliver that comfort better than a classic creamy pumpkin soup. It’s warm, indulgent, and incredibly easy to prepare, making it a go-to for families, foodies, and anyone craving a cozy bowl of nourishment. 

Better still, every key ingredient in this soup—butternut pumpkin, onion, garlic, and bread—is available at Victoria Fruit Palace, making it a breeze to shop local and eat well. 


Ingredients (Grab These at Victoria Fruit Palace): 

  • 1 kg butternut pumpkin, peeled and chopped 
  • 1 large onion, finely diced 
  • 2 cloves of garlic, minced 
  • 2 cups vegetable or chicken stock 
  • 1 cup thickened cream (or coconut cream for a vegan option) 
  • Olive oil 
  • Salt and pepper to taste 
  • Day-old bread (for croutons) 


Method: How to Make Creamy Pumpkin Soup

Sauté the Base:
In a large pot, heat a generous splash of olive oil. Add the diced onions and garlic. Cook gently for about 3–5 minutes until translucent and fragrant. This is the aromatic foundation of your soup. 

Cook the Pumpkin:
Add in your chopped butternut pumpkin and sauté for another 5 minutes, allowing it to caramelize slightly. This step enhances the natural sweetness of the pumpkin. 

Simmer to Soften:
Pour in the stock and bring everything to a boil. Reduce heat, cover, and let it simmer gently for about 20 minutes or until the pumpkin is fork-tender. 

Blend to Smoothness:
Use a stick blender to purée the soup right in the pot (or transfer to a stand blender). Once velvety and smooth, stir in the cream. Taste and season with salt and pepper. 

Make the Garlic Croutons:
Cube your day-old bread. Toss the pieces with olive oil, salt, and an optional sprinkle of garlic powder. Toast in a hot oven (200°C) for about 10–12 minutes, turning halfway through until golden and crunchy. 

Serve with Style:
Ladle the soup into bowls, swirl in a spoonful of cream, and top with crispy garlic croutons. A sprig of fresh parsley or a crack of black pepper adds that final gourmet touch. 


Tips & Tricks: 

  • For extra depth, roast the pumpkin before simmering. 
  • Want spice? Add a pinch of nutmeg, cumin, or even chili flakes. 
  • No cream? Use milk, coconut cream, or even Greek yogurt. 
  • Double the batch and freeze for future meals! 


Why This Recipe Works in Winter 

Australians have a deep love for pumpkin soup, especially when the temperature drops. It’s budget-friendly, versatile, and nourishing. But the real magic lies in how easily you can adapt it based on what’s available—making this recipe a seasonal staple you can rely on. 


Final Thoughts 

Winter is the perfect season to bring warm dishes into your home, and this creamy pumpkin soup with garlic croutons is as soul-satisfying as it gets. Plus, by shopping local at Victoria Fruit Palace, you’re not just feeding your family—you’re supporting your community. 

Whether you’re a home cook, a busy parent, or simply love easy, hearty meals, this recipe is your golden ticket to comfort in a bowl. 

Need Home delivery of groceries? Shop online today!

Woman Hand Pourung A Hot Black Tea

PUKKA Tea Infused Iced Tea


Chef: Adapted from Taste.com.au’s Iced Tea Recipe
Course: Beverage
Cuisine: Herbal / Wellness
Servings: Makes 2–3 refreshing glasses
Prep Time: 5 minutes
Steeping & Cooling Time: 15–30 minutes


A Naturally Refreshing and Calming Drink

There’s nothing quite as refreshing as a glass of iced tea on a warm afternoon—or even as a gentle, calming beverage before bed. This easy, adaptable herbal iced tea recipe made with PUKKA tea bags is not only delicious but also packed with the natural benefits of your favourite herbal blends like Chamomile, Peppermint, or Green Tea.

Perfect for those looking to reduce sugar intake or enjoy a natural alternative to soft drinks, this homemade iced tea is lightly sweetened with honey or maple syrup and customizable with your favourite garnishes. It’s ideal for entertaining guests, staying hydrated on sunny days, or simply winding down with a cold, wellness-focused drink.


Ingredients

Everything you need to make this recipe can be found in your pantry or fridge:

  • 2 PUKKA tea bags – Choose your favourite blend (e.g., Chamomile for calm, Peppermint for digestion, Green for energy)

  • 2 cups boiling water

  • 2 tablespoons honey or maple syrup – Adjust to taste for natural sweetness

  • 1 cup cold water

  • Ice cubes

  • Lemon slices and fresh mint – Optional garnish for flavour and visual appeal


Instructions

Step 1: Brew the Tea

Start by placing your chosen PUKKA herbal tea bags into a heatproof jug or large mug.
Carefully pour 2 cups of freshly boiled water over the bags.
Allow the tea to steep for 5 minutes to fully release the flavours and natural oils.
Once steeped, remove and discard the tea bags.

Step 2: Add Natural Sweetener

While the tea is still warm, stir in your choice of honey or maple syrup until completely dissolved. This adds a hint of sweetness while maintaining the purity of the herbal flavours. Adjust to taste—some blends may require less sweetening than others.

Step 3: Cool the Tea

Add 1 cup of cold water to the mixture to help it cool faster.
Allow the tea to sit until it reaches room temperature, then place it in the refrigerator for at least 15–20 minutes or until thoroughly chilled.

Step 4: Serve and Enjoy

When ready to serve, fill 2–3 glasses with ice cubes.
Pour the chilled tea over the ice and garnish with lemon slices, fresh mint, or even a slice of cucumber or orange for an extra refreshing twist.
Sip and enjoy a moment of calm and hydration.


Serving Tips & Variations

  • For a citrus twist, add a splash of freshly squeezed lemon or orange juice.

  • Make it a sparkling iced tea by replacing the cold water with sparkling mineral water for a bubbly version.

  • Turn it into an iced tea mocktail with berries, rosemary, or edible flowers for a party-ready presentation.

  • Use multiple tea bags or a mix of flavours (like Peppermint + Licorice or Chamomile + Vanilla) for a more complex taste.


Why You’ll Love This PUKKA Iced Tea Recipe

✔ Caffeine-free options available for day or night sipping
✔ Naturally sweetened with no refined sugar
✔ Refreshing, hydrating, and calming
✔ Fully customizable with different tea blends and garnishes
✔ Quick to make—no stovetop required


Shop the Full PUKKA Tea Range

Ready to explore more organic, ethically sourced herbal tea blends from PUKKA?
Visit our shop to browse our complete collection and discover your next favourite. Whether you prefer calming teas for the evening or energising brews to start your day, we’ve got something for everyone.

? Stock up now while supplies last – special offers available for a limited time!

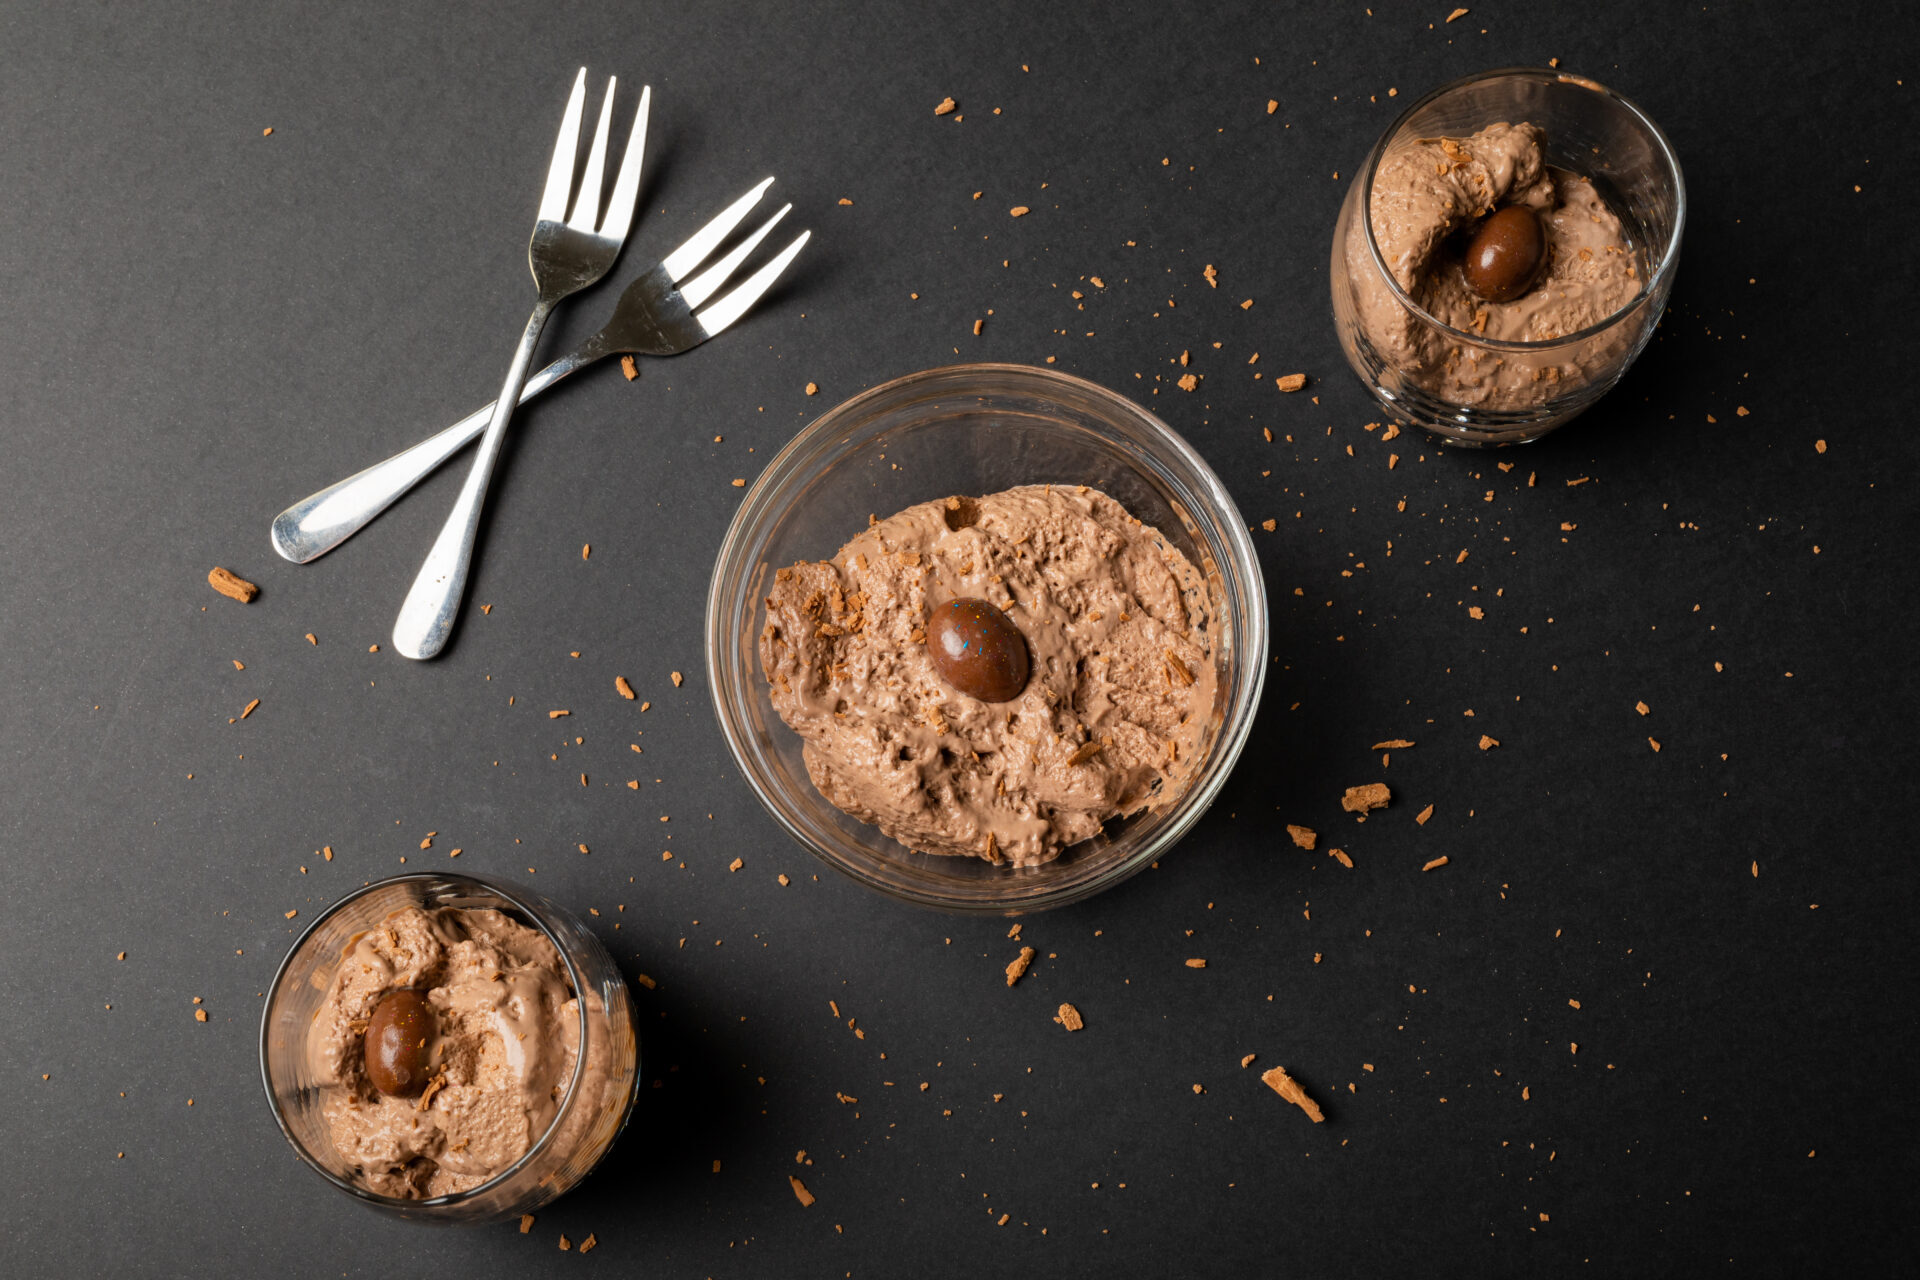
High Angle View Of Chocolate Mousse With Coated Nuts, Shredded Chocolate And Forks On Table. Unaltered, Dessert, Sweet Food, Candy And Chocolate Indulgence.

Decadent Chocolate Grove Mousse Recipe


Chef: Adapted from BBC Good Food’s Chocolate Mousse Recipe
Course: Dessert
Servings: Makes 4–6 small dessert glasses
Prep Time: 20 minutes
Chill Time: 2+ hours
Skill Level: Easy to Intermediate


A Silky-Smooth Chocolate Delight for Every Occasion

If you’re craving an indulgent dessert that’s both simple to make and irresistibly rich, this dark chocolate mousse recipe featuring Chocolate Grove’s premium 200g dark chocolate is the ultimate treat. Whether you’re celebrating a special moment or simply elevating your evening meal, this mousse delivers a luscious, velvety texture with deep cocoa notes that chocolate lovers will swoon over.

Crafted with just a handful of quality ingredients, this recipe transforms Chocolate Grove’s carefully crafted dark chocolate into a silky mousse with luxurious depth and a light, airy finish. Serve it in elegant glassware for a dinner party or enjoy it solo as a decadent pick-me-up. Either way, it’s a showstopper.


Ingredients You’ll Need

  • 200g Chocolate Grove Dark Chocolate (or your favourite dark variety)

  • 3 large eggs, separated

  • 1/4 cup caster sugar

  • 1 cup thickened cream

  • 1/2 tsp pure vanilla extract

  • Pinch of salt


Step-by-Step Instructions

Step 1: Melt the Chocolate

Break the chocolate into small chunks and place it in a heatproof bowl.
Set the bowl over a pan of gently simmering water (double boiler method).
Stir occasionally until the chocolate melts into a glossy, smooth texture.
Remove from heat and let it cool slightly – you want it warm, not hot.

Step 2: Whisk the Egg Yolks and Sugar

In a mixing bowl, combine the egg yolks and caster sugar.
Whisk vigorously (or use a hand mixer) until the mixture becomes pale, creamy, and thick – this adds richness and structure to your mousse.

Step 3: Combine Chocolate and Egg Yolk Mixture

Gently fold the slightly cooled chocolate into the yolk-sugar mixture using a spatula.
Ensure the ingredients are well incorporated, resulting in a rich, glossy base.

Step 4: Whip the Cream

In a separate bowl, whip the thickened cream with vanilla extract until soft peaks form.
Be careful not to overwhip—it should be smooth, light, and pillowy.

Step 5: Beat the Egg Whites

In a clean, dry bowl, whisk the egg whites with a pinch of salt until stiff peaks form. This will give the mousse its signature airiness.

Step 6: Bring it All Together

Gently fold the whipped cream into the chocolate mixture.
Next, carefully fold in the beaten egg whites in batches.
Use slow, sweeping motions to keep the mixture light and fluffy.

Step 7: Chill and Set

Spoon the mousse into your choice of serving glasses, ramekins, or dessert bowls.
Refrigerate for at least 2 hours (longer if possible) to allow the mousse to set and develop flavour.


Serving Suggestions

Elevate your mousse presentation with elegant garnishes:

  • A sprinkle of shaved dark chocolate

  • A few fresh raspberries or strawberries

  • A sprig of mint for a refreshing contrast

  • A light dusting of cacao powder or icing sugar


Why You’ll Love This Recipe

✅ Uses Chocolate Grove’s premium dark chocolate
✅ Only 6 ingredients
✅ No baking required
✅ Rich, creamy, and naturally gluten-free
✅ Perfect for dinner parties or a luxurious solo dessert


Shop the Star Ingredient – Chocolate Grove 200g Dark Chocolate

Crafted from high-quality cocoa beans and carefully tempered for smoothness, our Chocolate Grove dark chocolate is the key to creating desserts that truly stand out. Stock up today and take advantage of our September specials – available for a limited time only!

? Explore our full chocolate range here

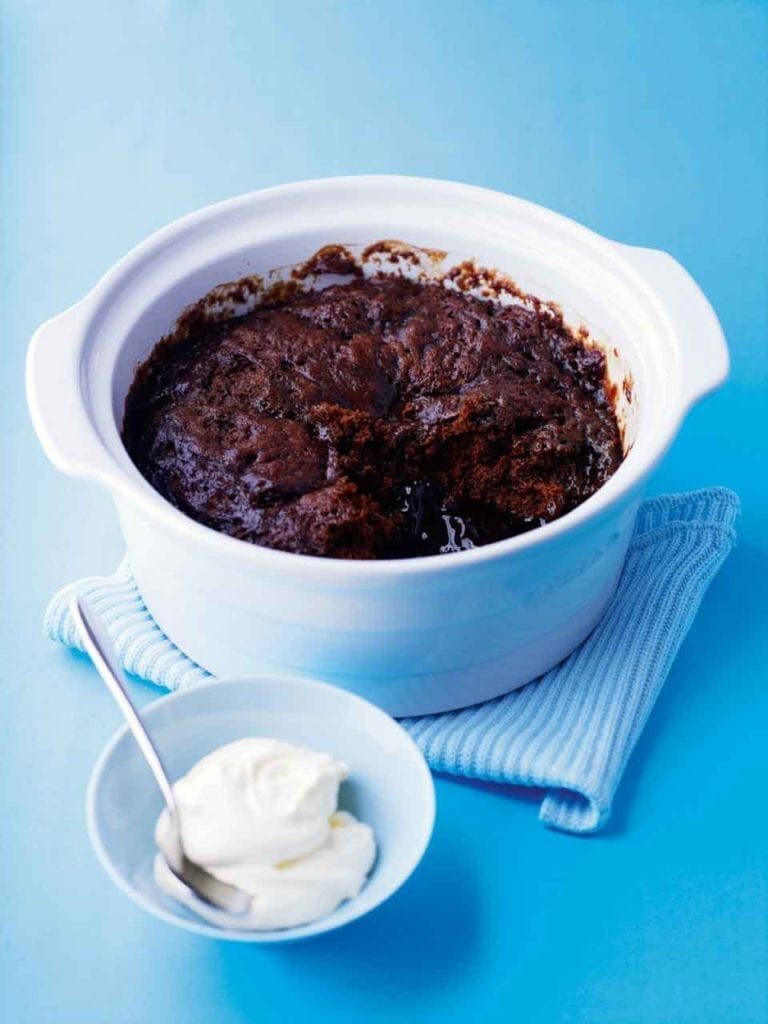
Chocolate Pudding

Self-Saucing Microwave Chocolate Pudding

Chef: Adapted from a Delicious Recipe
Course: Dessert
Cuisine: Australian Comfort Food
Servings: 4–6 people
Prep Time: 10 minutes
Cook Time: 8 minutes
Rest Time: 5 minutes
Total Time: Approx. 25 minutes


A Decadent Microwave Dessert for Chocolate Lovers

Looking for a quick and satisfying chocolate dessert without turning on the oven? This Microwave Chocolate Self-Saucing Pudding is the perfect choice. Rich, gooey, and comforting, this classic pudding magically creates its own luscious sauce while cooking. It’s perfect for last-minute entertaining, family dinners, or a weeknight treat that feels indulgent yet takes minimal effort. With basic pantry ingredients and a few simple steps, you’ll have a warm, chocolatey dessert ready in under 10 minutes.


Ingredients

This recipe uses pantry staples and delivers maximum flavour with minimal fuss.

For the Batter

  • 60g unsalted butter, melted

  • 225g self-raising flour

  • 375g raw sugar (or caster sugar)

  • 60g cocoa powder, divided (25g for batter, 35g for sauce)

  • 180ml full-cream milk

  • 2 teaspoons pure vanilla extract

For the Sauce Layer

  • 300ml boiling water

  • (Optional) 2–3 tablespoons soft brown sugar, for a richer sauce


Instructions

Step 1: Prepare the Base

In a deep, microwave-safe 20cm round dish (preferably glass or ceramic), melt the butter in the microwave. This should take about 30–45 seconds on high. Remove and set aside.

Step 2: Mix the Batter

Add the self-raising flour, raw sugar, 25g of the cocoa powder, milk, and vanilla extract directly into the dish with the melted butter. Mix well until a smooth batter forms. Make sure there are no lumps—use a fork or whisk for best results. The batter should be thick but pourable.

Step 3: Add the Topping

Evenly sprinkle the soft brown sugar (if using) and remaining 35g of cocoa powder over the surface of the batter. Do not stir. Carefully pour the boiling water over the back of a spoon held just above the batter—this step helps keep the layers separate and creates the signature self-saucing effect.

Step 4: Microwave to Perfection

Place the dish in the microwave and cook on high power for 8 minutes. Microwave strengths vary, so start checking at the 7-minute mark. The pudding should be risen and firm on top with bubbling sauce underneath.

Step 5: Rest and Serve

Allow the pudding to sit for at least 5 minutes before serving. This resting time allows the sauce to thicken slightly and the sponge to finish setting. Serve warm, spooned into bowls with the rich chocolate sauce poured over the top.


Serving Suggestions

  • Pair with a generous scoop of vanilla ice cream for a hot-and-cold contrast

  • Drizzle with double cream or custard for extra indulgence

  • Garnish with fresh berries, mint leaves, or a light dusting of icing sugar for presentation


Pro Tips & Variations

  • Want a nuttier twist? Add a handful of chopped hazelnuts or walnuts to the batter.

  • For a mocha version, substitute 100ml of the boiling water with freshly brewed coffee.

  • Swap raw sugar for brown sugar in the batter for deeper caramel notes.


Why You’ll Love This Recipe

✔ Quick to prepare and cook
✔ No oven required
✔ Pantry-friendly ingredients
✔ Great for entertaining or late-night cravings
✔ Classic comfort food that never disappoints


This microwave chocolate self-saucing pudding is a nostalgic favourite for many—and once you try it, it might just become your go-to dessert too. Perfect for cosy nights in or surprising guests with something decadent, it’s a fuss-free way to satisfy any sweet tooth.